In the Deductee option, all details of the deductees are stored. Once the deductee is created in the setup, it will appear in the help window of the transaction module. The user will just need to select the Deductee from the help window to populate the details of the deductee in the required fields.
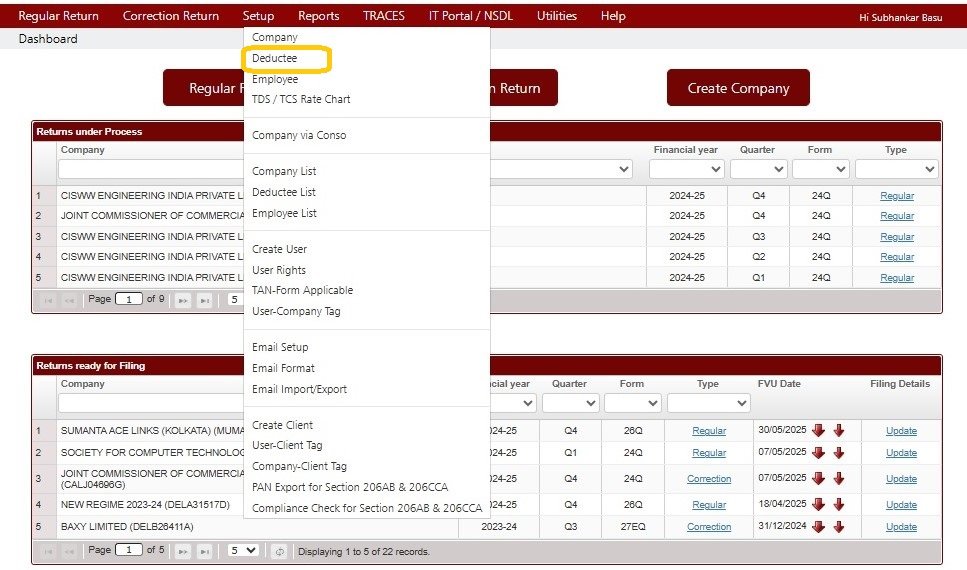
Note: Whenever a user saves a record of new deductee in transaction module, its master gets automatically created.In order to access deductee, Click on Deductee under Setup option as displayed below:
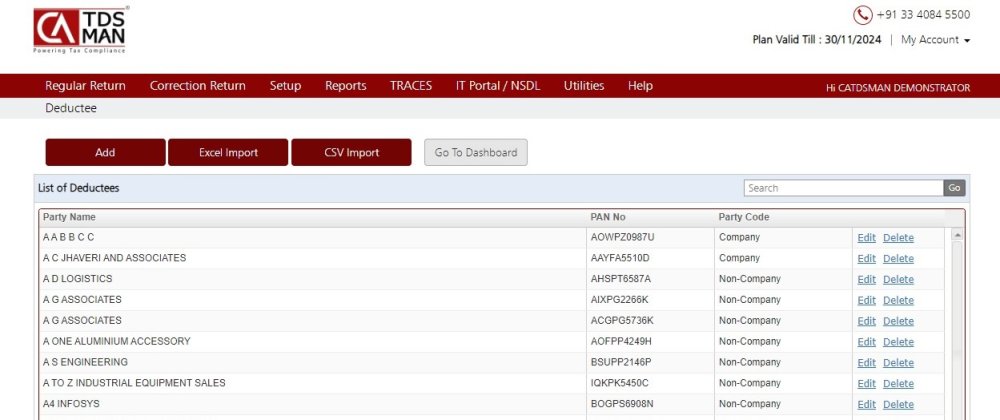
The following window appears :
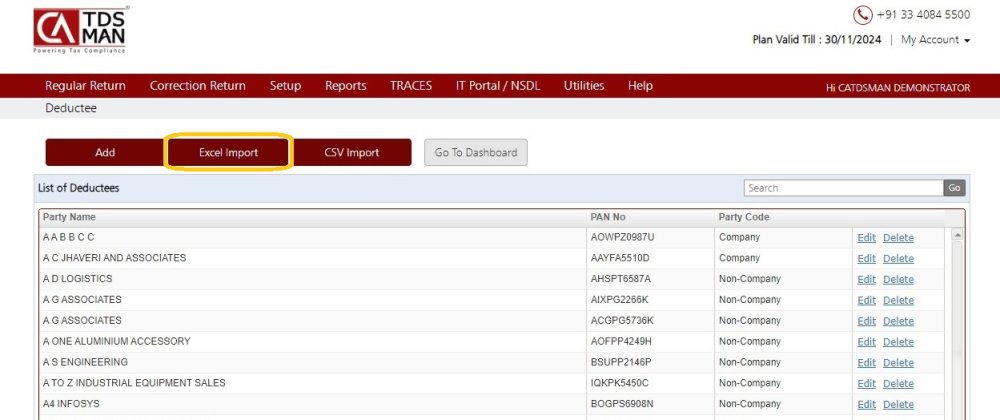
The list of all the deductees that has already been defined in the CA-TDSMAN software is displayed here.
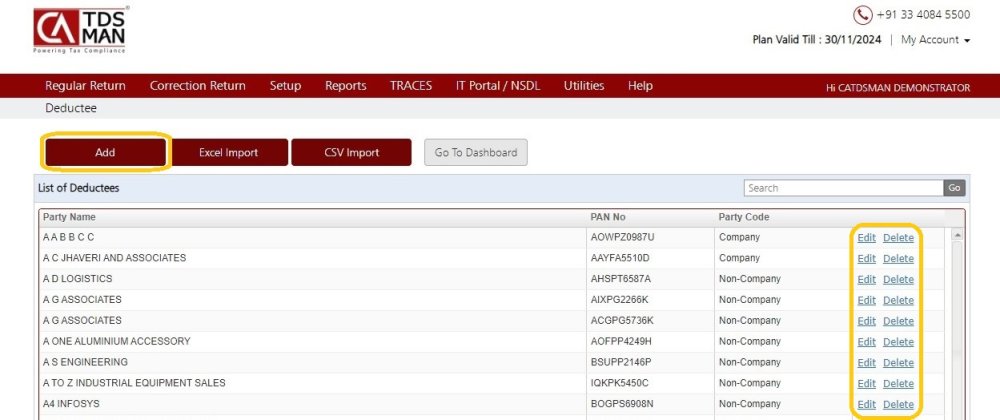
In order to add a new deductee, click on the Add button given at the top of the screen.
CA-TDSMAN software gives the option to import the new deductee(s) details through Excel Import by clicking at this option.
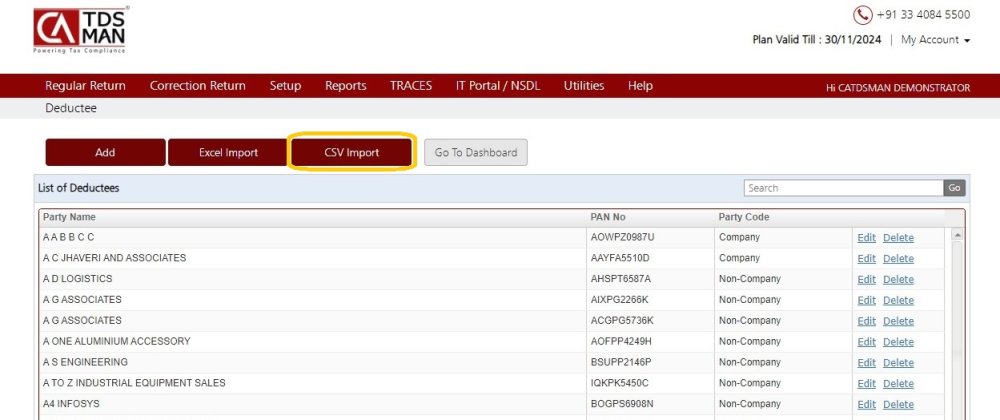
CA-TDSMAN software gives the option to import the new deductee(s) details through CSV Import by clicking at this option.
In order to edit the existing deductee data, click on the EDIT button given at the right side of the screen.
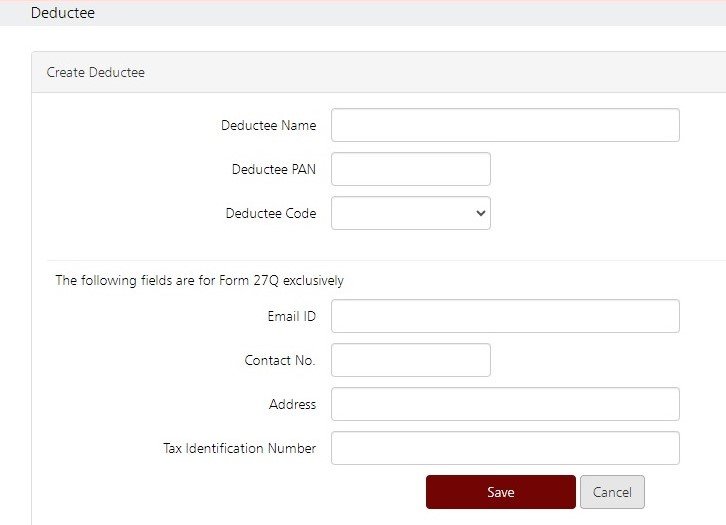
The entire deductee details screen is displayed and explained below:
The brief description of the fields is shown below:
• Deductee Name (Mandatory) – Enter the name of the deductee.
• Deductee PAN (Mandatory) – Enter the PAN of the deductee. In case the deductee is not having PAN then “PANNOTAVBL” meaning PAN not available, has to be entered.
• Deductee Code (Mandatory) – It has to be either 01 or 02. If deductee type is Company select 01 else if deductee type is non-company select 02.
• Email ID – Enter the e-mail address.
• Contact Number – Enter the mobile no.
• Address – Enter the address.
• Tax Identification Number – Enter your TIN Number
After entering all the required details, click on Save
Note: Address, Mobile and Email of the deductee is not submitted in the TDS return. This is required only to print the TDS Certificate through the software.
Delete Deductee
In order to Delete an existing deductee from the deductee list, click on the Delete button given at the right side of the screen:-
Note: A deductee cannot be deleted if it has been used to generate any Return.
• Add Deductee Data Using Excel
Deductee data can be prepared in Excel Sheets and then imported into the system. This would save effort in entering data through formats of the software interface. Click on Excel Import
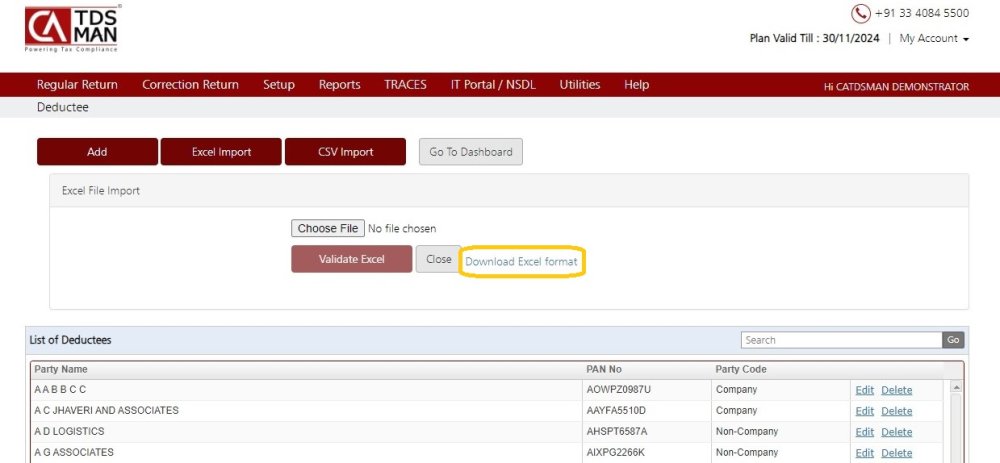
The following screen will get displayed:
• Download Excel Format
Deductee data needs to be provided in a structured Excel format. In case the format is not available, this needs to be downloaded from Download Excel Forma option.
After downloading the Excel format, the deductee details have to be entered in the worksheet. It is recommended that after entering the data in the downloaded excel sheet, ‘Save’ the data with a different file name so that the original empty excel sheet can be reused for adding other company details.
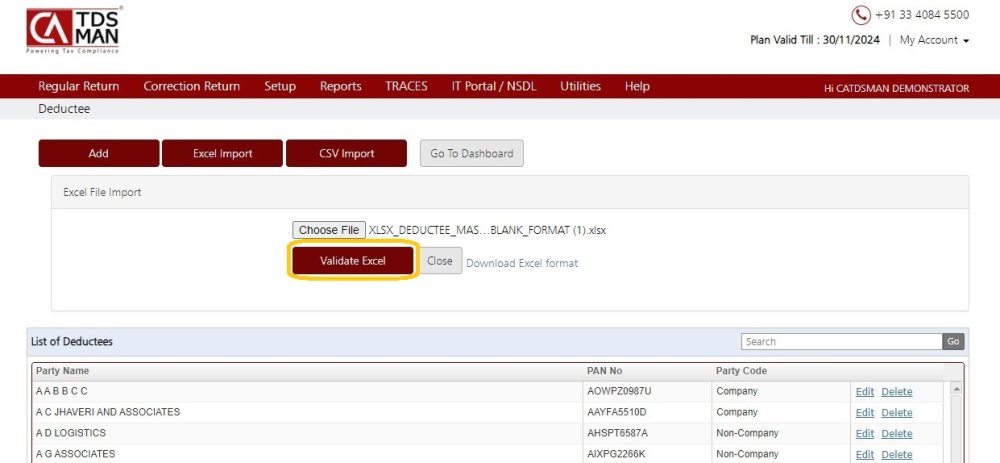
Now, select this Excel file by clicking on ‘Choose File’. Click on ‘Validate Excel’
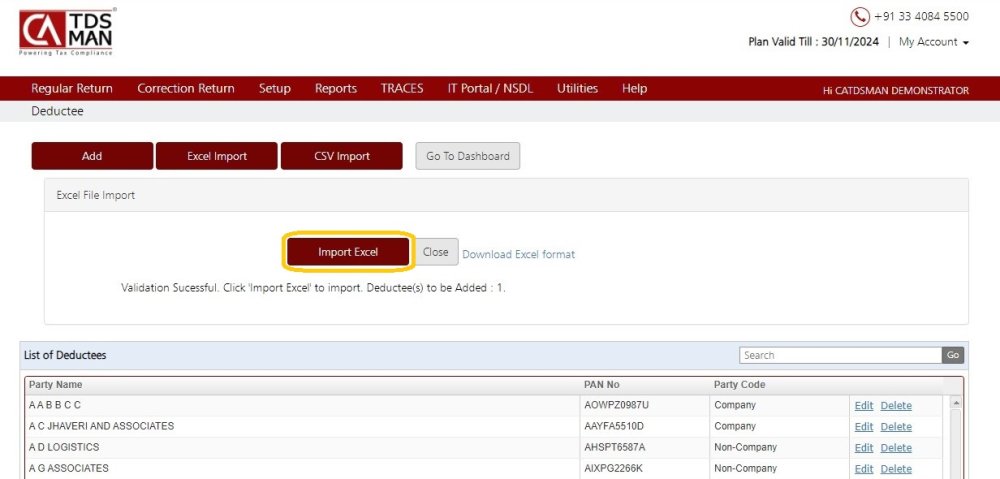
Click on lmport Excel button to upload the data in the system. (Please ensure proper format of excel file is used, otherwise it will display error) Following is displayed below:
Then following is displayed below
Click on “Close”
Add Deductee Data Using CSV
Deductee data can be prepared in CSV Sheets and then imported into the system. This would save effort in entering data through formats of the software interface. Click on CSV Import :
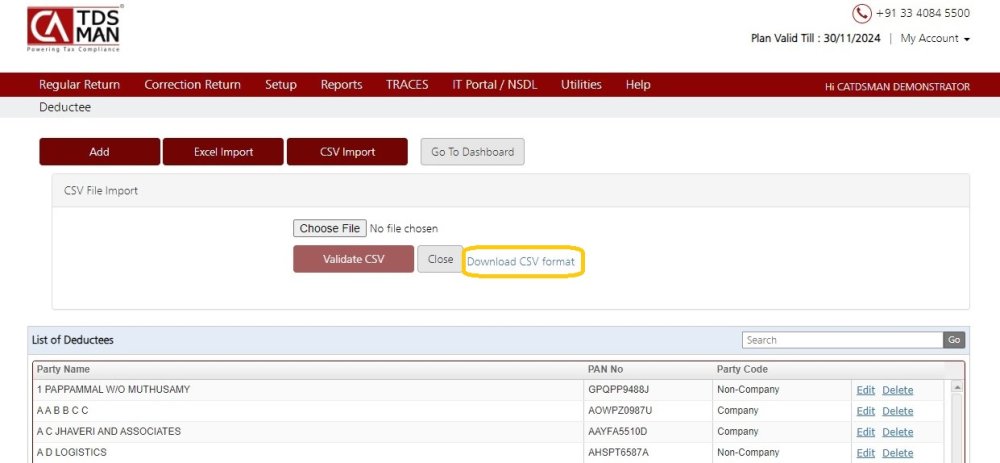
The following screen will get displayed :
• Download CSV Format
Deductee data needs to be provided in a structured CSV format. In case the format is not available, this needs to be downloaded from Download CSV Format option.
After downloading the CSV format, the deductee details have to entered in this CSV file. It is recommended that after entering the data in the downloaded CSV file, ‘Save’ the data with a different file name so that the original empty CSV file can be reused for adding other deductee details.
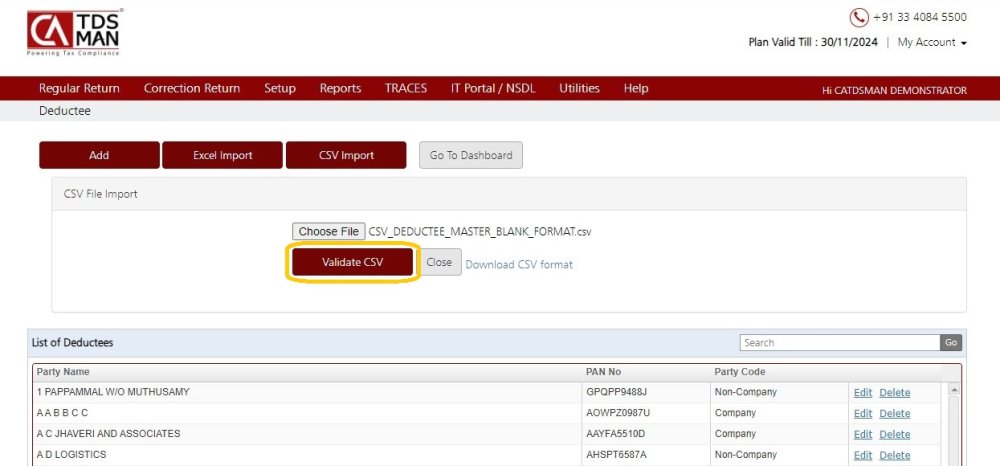
Now, select this CSV file by clicking on ‘Choose File’ . Click on ‘Validate CSV’.
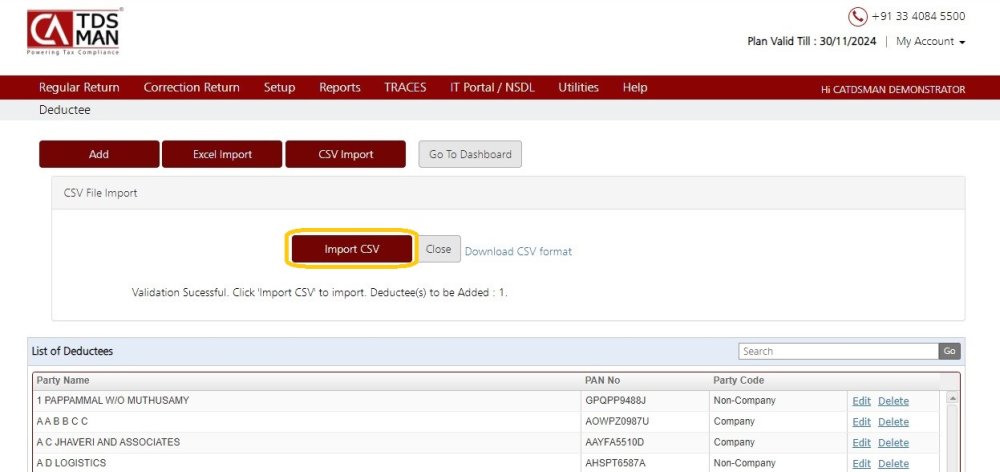
Click on Import CSV button to upload the data in the system. (Please ensure proper format of CSV file is used, otherwise it will display error) Following is displayed below:
On successful importing of data, the following screen will get displayed :
Click on ‘Close’
Need more help with this?
CA-TDSMAN - Support


